![]()
Blog post video tutorial available on youtube
About Digital Ocean
Digital Ocean is a simple cloud hosting service built for developers.
Unlike other services that have tools like cPanel and Jailshells, Digital Ocean provides you with full root access which gives you complete control over your server. This freedom also requires you to know what you are doing in order to get everything in working order.
Getting Started
To get started, go to Digital Ocean and sign up. Make sure you use my link in order to get a free $10 in credit (2 months of server time) added to your account.
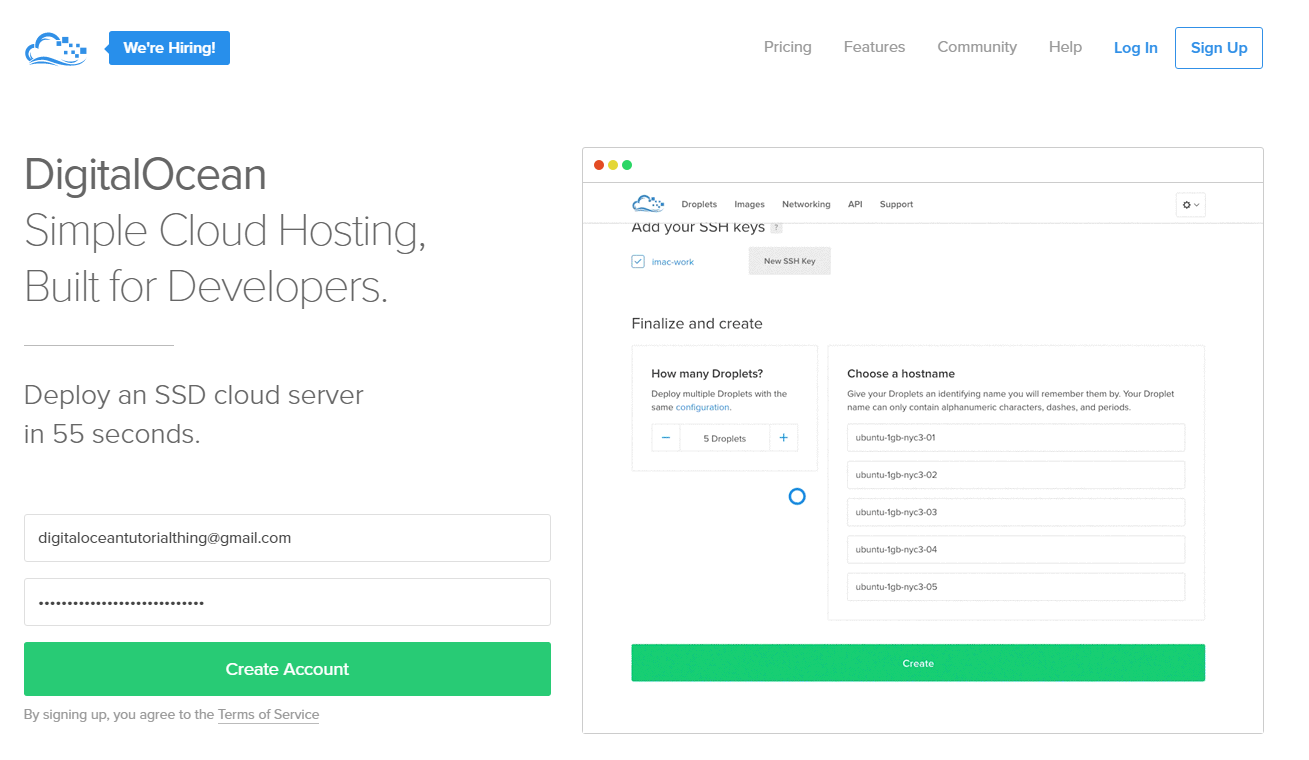
Once you have signed up, have verified your email, and have added a form of payment, you are ready to set up your first droplet (droplet = server in DO jargon).
Creating a droplet
Click on Create Droplet, and make the most important decision: which OS you want this server to run.
It's mostly a matter of personal preference which OS to choose...so personally, I'd stick with Ubuntu 15.10 x64. I'm not going to waste half a page giving reasons for choosing it over another version, 32/64 bit, OS, LTS or not, etc., I'm sure you can find thousands of arguments on Google for that. But the main reasons are: the large community you can talk to for support, large library of packages supported through apt-get, and there are a huge number of tutorials out there that use Ubuntu as their OS of choice which makes following along MUCH easier (exhibit A).

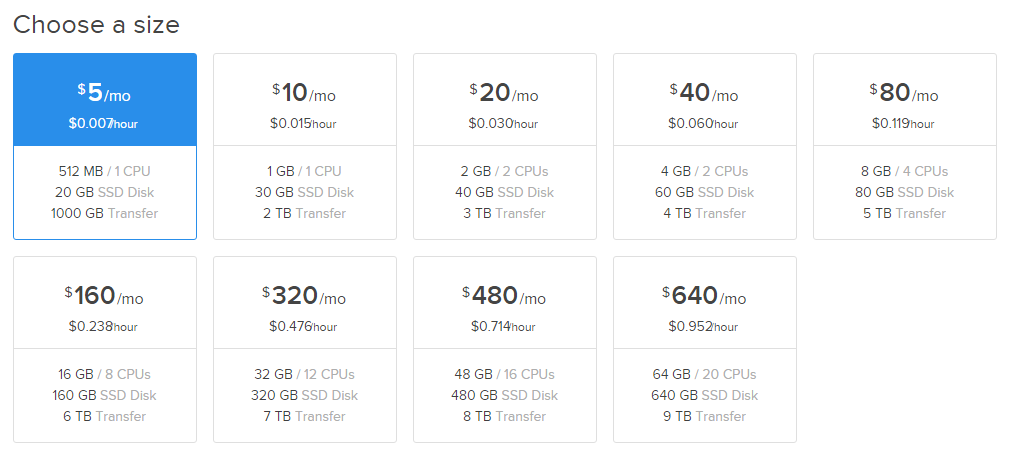
Next, pick a droplet size. Keep in mind that you can resize your droplet in the future if your server demands it, but only upwards. Unless you choose flexible resizing, you will not be able to go back to a lower and cheaper tier. So, I'd play it safe by starting off at $5.
And finally, choose which region you'd like your server hosted. It'd probably be the best to choose a region closest to you/your audience in order to lower latency...although it probably won't be very noticeable unless your website is very high demand. Check this article out to learn more.

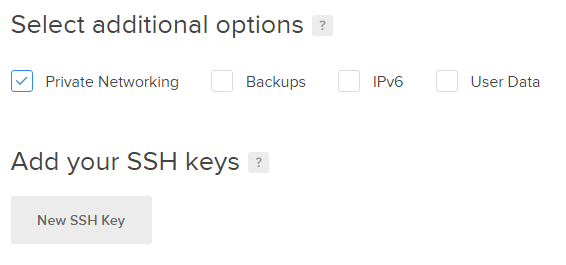
For additional options, I'd just choose Private Networking in case I end up spinning up another droplet that I'd like to easily communicate with using an internal IP.
Now we wait ~55 seconds for your droplet to be created. You should receive an email shortly after creating your droplet that will contain your IP address, and root password.

55 seconds later...

Configuring your droplet
Open up your favorite Terminal client and ssh to your new server! For Windows users, you can download a terminal client such as Cygwin or PuTTY or follow along from your droplet's console on DO by clicking on your droplet and then clicking console access.
$ ssh root@your_ip_address
Once you have logged in, you will have to change your root password for security measures.
$ ssh [email protected]
The authenticity of host '12.34.56.78 (12.34.56.78)' can't be established.
ECDSA key fingerprint is SHA256:zqAUPWpCLXCCUCLKaj+jNAxgKw1FRRh+lVvFH3q0f2k.
Are you sure you want to continue connecting (yes/no)? yes
Warning: Permanently added '12.34.56.78' (ECDSA) to the list of known hosts.
[email protected]'s password:
You are required to change your password immediately (root enforced)
Welcome to Ubuntu 15.10 (GNU/Linux 4.2.0-27-generic x86_64)

 * Documentation:  https://help.ubuntu.com/
Changing password for root.
(current) UNIX password:
Enter new UNIX password:
Retype new UNIX password:
root@ubuntu-512mb-sfo1-01:~#
Now with that out of the way, we are going to update all of the packages on your new droplet to their latest versions using apt-get.
Run apt-get update followed by apt-get upgrade -y to update all of the packages currently installed on your droplet.
# apt-get update && apt-get upgrade -y
Next, we are going to update the kernel using apt-get dist-upgrade -y.
# apt-get dist-upgrade -y
And finally, we are going to remove the old kernel with apt-get autoremove -y and then reboot the droplet to load in the latest kernel by typing reboot.
# apt-get autoremove -y && reboot
Now it's time to secure your account. First, we are going to set up a personal account for yourself, give it sudo privileges, and then lastly disable root login.
Type adduser username_here to add a new user. Give the user a password and then leave the rest of the values blank by pressing enter.
Now, type visudo and look for the line # User privilege specification.
Follow the format of root and type a new line with your username. It should look something like this:
# User privilege specification
root    ALL=(ALL:ALL) ALL
username_here (ALL:ALL) ALL
Save the file with ctrl + x, y, enter
Now, we will disable root login for security.
Type nano /etc/ssh/sshd_config
Find the line that says PermitRootLogin yes and change the yes to no.
Save the same way as before with ctrl + x, y, enter.
And type service sshd restart to make the changes take effect. You should be unable to login as root now...use your new account you just created from now on. If you need to run something as root, you should prepend the sudo keyword to your command.
Congratulations! You have finished setting up your Digital Ocean droplet!
In a future blog post, we will go over setting up an NGINX web server as well as setting up a node server that uses the reverse proxy feature of NGINX.